Oh, hello there, my friend! Have you ever dreamt of making authentic traditional kimchi right in your very own kitchen? You know, the kind that tastes exactly like a loving Korean Grandma spent hours perfecting? I get it, it might seem a little intimidating at first, but trust me, after spending over two decades in Canada and the US, perfecting my own techniques and drawing from countless phone calls with my own grandma back in Korea, I can tell you it’s totally doable, and the reward of homemade deliciousness is so incredibly worth it!
Making kimchi from scratch is such a profoundly rewarding experience. It’s not just about creating a delicious dish; it’s about connecting with a rich cultural heritage, understanding the magic of fermentation, and truly, truly bringing a taste of Korea right to your table. We’re going to walk through each step together, just like a grandma would teach you, so you can create your very own batch of this amazing Korean staple. Get ready to fill your home with the most wonderful aromas!
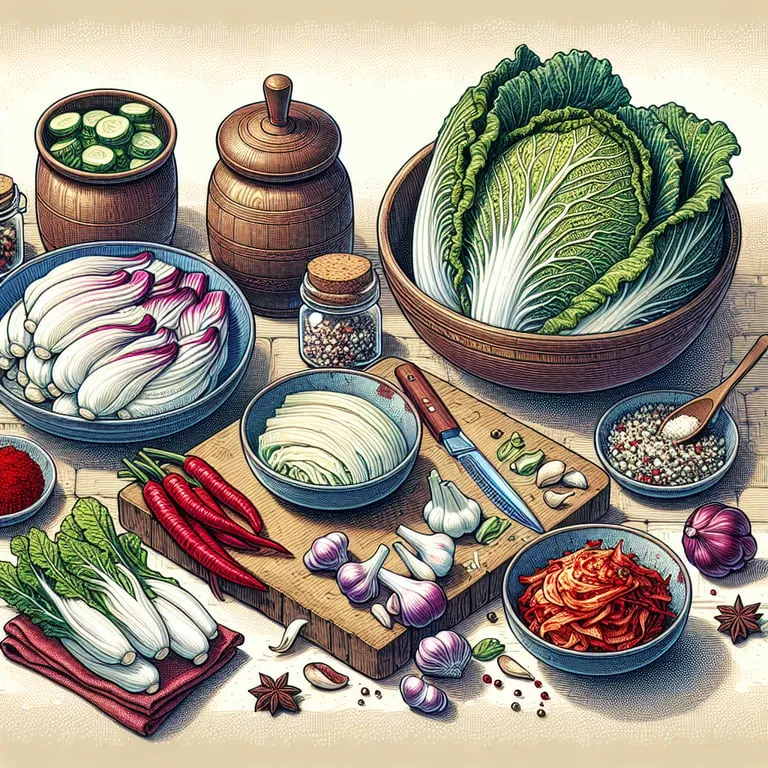
The Heart of Kimchi: Choosing Your Essential Ingredients
Okay, let’s talk ingredients! This is seriously where the magic begins, you know? Think about it – grandma’s secret wasn’t just her hands, but picking out the absolute best stuff from the market! Getting the right ingredients is, dare I say, half the battle won?! Absolutely! It’s like building a house; you need a solid foundation, right? And for kimchi, that foundation is your selection of fresh, vibrant vegetables and key seasonings. Using top-quality, authentic ingredients is what gives traditional kimchi its deep, complex flavor profile that you just can’t replicate with substitutes, truly.
Napa Cabbage (Baechu): The Unsung Queen
First up, the undisputed queen: Napa Cabbage, or Baechu (배추) as we call it! Finding the right cabbage is crucial. You want heads that feel heavy for their size – that usually means they’re dense and juicy! Look for ones with bright green outer leaves and firm, pale yellow insides. Avoid any with significant bruises, brown spots, or wilted outer leaves, as these can impact both flavor and fermentation stability. Korean grandmas often say the best cabbage is harvested in late autumn (Gimjang season!), around November, because it’s naturally sweeter and firmer, holding up beautifully during the brining and fermentation process. For a typical batch using, say, a large kimchi container (around 10-15 liters), you might need anywhere from 2 to 4 substantial heads, each weighing roughly 2.5 to 3 kilograms before trimming. Quality here is non-negotiable, seriously! The cellular structure needs to be intact to withstand the salting properly and ferment evenly. Choosing organic can also make a difference in flavor purity and avoiding unwanted pesticides, which is something I’ve personally noticed makes a difference in the final taste!
The Unforgettable Salt (Cheonilyeom): More Than Just a Seasoning
Next? Salt! And not just any salt, mind you. For brining (the process of salting the cabbage to draw out water and preserve its crunch), you must use a good quality coarse sea salt. Korean coarse sea salt, or Cheonilyeom (천일염), is often considered the gold standard! Why? Because its higher mineral content (like magnesium, calcium, and potassium) compared to refined table salt can actually influence the fermentation process, contribute to the development of beneficial bacteria, and even affect the final texture and taste of the kimchi. Avoid fine table salt that often contains anti-caking agents; it dissolves too quickly and can make the cabbage excessively salty without achieving the desired texture. You’ll need quite a bit for the brining stage – depending on your method (dry salting or brine solution), you might use anywhere from 500 grams to 1.5 kilograms of coarse salt for those 2-4 cabbages! A common brine solution ratio is around 10-15% salt to water, ensuring enough osmotic pressure to draw out water efficiently without “cooking” the cabbage. It’s not just for making it salty; it draws out water, inhibits spoilage organisms, and prepares the cabbage for the wonderful world of fermentation!
Flavor Architects: Radish, Garlic, Ginger, and Scallions
Don’t forget the Korean radish, or Mu (무)! This adds a fantastic crunch, a refreshing coolness, and a slightly sweet, peppery note that beautifully balances the heat and saltiness. Look for radishes that are firm, heavy, and have smooth, unblemished skin. A medium to large-sized radish, weighing perhaps 700 to 1000 grams, is usually sufficient for a batch of kimchi made with 3-4 cabbages. It’s most often sliced into thin matchsticks or sometimes chunks for the filling! The natural sugars in the radish also feed the fermenting bacteria, contributing to the complex flavors.
Now for the true flavor powerhouses: Garlic (Maneul – 마늘), Ginger (Saenggang – 생강), and Scallions (Pa – 파)! Use fresh garlic and ginger, not powders – the difference in aroma and potency is immense, trust me!! For our batch size (3-4 cabbages), you’ll need a generous amount of garlic, maybe 250 to 400 grams of peeled cloves, and about 80 to 120 grams of fresh ginger. Scallions add a fresh, oniony bite; a large bunch or two (around 200-300 grams total) adds great flavor and visual appeal to the filling. These aromatics provide that complex, pungent depth kimchi is famous for and also contain natural compounds like allicin (in garlic) and gingerols (in ginger) which possess anti-microbial properties that help guide the fermentation towards beneficial lactic acid bacteria, suppressing less desirable ones! Freshness really counts here for maximum flavor impact. When I first started making kimchi in my apartment in Toronto, I underestimated the amount of garlic and ginger needed, and it just wasn’t the same. Learn from my early mistakes, go generous!
Gochugaru & Jeotgal: The Soulful Spices & Umami Bombs
And the vibrant soul of kimchi’s color and heat: Korean Chili Flakes, or Gochugaru (고추가루)! This isn’t just any chili powder; good quality, sun-dried Korean gochugaru has a distinct smoky sweetness, a pleasant fruity note, and a vibrant red color without being just searingly hot. The flavor profile is truly unique to Korean peppers! You’ll need a substantial amount – anywhere from 250 grams to 400 grams or even more, depending on how spicy you like it, the quality of the gochugaru itself, and how much color you want. There are different grinds: fine powder (fine gochugaru) is sometimes used to give the paste a smoother texture or for added color without visible flakes, while coarser flakes (coarse gochugaru) are standard for the main paste, adding texture and pronounced flavor. Make absolutely certain it’s Korean – the taste is genuinely different from chili powders from other regions due to the specific capsaicin profile and drying methods! Using enough isn’t just about heat; it contributes significantly to the vibrant red color and provides antioxidants, plus its sugars can also contribute to the fermentation process.
This next one might sound a little adventurous if you’re new, but Fermented Seafood, or Jeotgal (젓갈), is absolutely KEY for that deep, savory umami flavor that defines traditional kimchi and significantly helps the fermentation process along! Commonly used types are Fermented Shrimp (Saeujeot – 새우젓) or Fermented Anchovy Sauce (Myeolchiaekjeot – 멸치액젓), which is like a robust, flavorful fish sauce. Saeujeot, with its tiny fermented shrimp, offers a cleaner, slightly sweeter umami and contains enzymes that help break down proteins during fermentation. Myeolchiaekjeot is richer, more pungent, and provides intense depth. You’ll typically use 50 to 150 milliliters of the liquid Jeotgal or a few tablespoons (maybe 50-100g) of the whole shrimp version, mashed, for a batch. Don’t skip this unless you’re making a strictly vegan kimchi; it provides essential amino acids, enzymes, and a rich source of beneficial microbes that jump-start and guide the lacto-fermentation. The pungent aroma of jeotgal might be surprising at first, but it truly transforms during fermentation into an irreplaceable depth of flavor.
Lastly, you might need a binder and a touch of sweetness to round out the paste. A simple paste made from glutinous rice flour (Chapssalgaru) or rice flour (Ssalgaru) cooked with water, known as Pul (풀), is often used to help the chili paste cling beautifully to the cabbage leaves. This Pul also provides readily available carbohydrates for the lactic acid bacteria, helping the fermentation kick off quickly and consistently! You might use about 50 to 80 grams of rice flour cooked with water into a thick porridge-like consistency. And a bit of sugar (like a few tablespoons of granulated sugar) or natural sweeteners like puréed Asian pear or apple (half a large pear or apple, maybe 150-200g) balances the salt and spice, adds complexity, and again, acts as essential food for the beneficial bacteria during fermentation! The pear or apple also adds a lovely natural sweetness and a subtle freshness.
See?! It’s quite a lineup, isn’t it? But getting these core ingredients, and making sure they’re top-notch, super fresh, and specifically Korean where it counts (like the gochugaru and jeotgal), is honestly the biggest favor you can do for your kimchi! Think of it as giving your fermentation journey the best possible start, laying down that perfect flavor foundation that’ll deepen and evolve over time. Using the right salt concentration and freshest aromatics sets the stage for successful lacto-fermentation, which is the core process defining authentic kimchi!
The Art of Brining: Laying the Foundation for Crunch
Ah, welcome back! Now that you have all your beautiful, fresh ingredients ready to go, it’s time for a step that’s truly, utterly foundational to fantastic kimchi: the brining process. This isn’t just a casual salting; it’s a precise technique that transforms tough cabbage into tender, yet crisp, leaves perfect for absorbing all that wonderful kimchi paste.
Why Brining is Non-Negotiable
Brining, or salting, serves several critical functions. Firstly, it draws out excess water from the cabbage cells through osmosis, making the leaves pliable and preventing a watery final product. This reduction in water content also concentrates the cabbage’s natural sugars, which are vital food for the beneficial lactic acid bacteria during fermentation! Secondly, salt acts as a selective antimicrobial agent. It inhibits the growth of undesirable spoilage microorganisms while promoting the growth of specific lactic acid bacteria, such as Lactobacillus kimchi and Leuconostoc mesenteroides, which are characteristic of traditional kimchi fermentation. This careful control ensures a safe and deliciously sour fermentation, preventing common issues like mold or rot. Without proper brining, your kimchi wouldn’t have that iconic crunch, nor would it ferment correctly! In my early days, I once rushed the brining, and the kimchi turned out soggy and less flavorful – a mistake I never repeated!
The Brining Process Demystified
First, you’ll want to prepare your cabbage. For large heads (2.5-3 kg each), quarter them lengthwise, cutting through the core. For smaller heads, halving might suffice. Then, carefully separate the leaves without tearing them, especially near the core. This allows the salt to penetrate evenly.
Next, it’s time to apply the salt. You have two main methods: dry salting or using a brine solution. For home cooks, dry salting is often preferred for its simplicity. Liberally sprinkle the coarse sea salt between each leaf, focusing on the thicker white parts near the core, as these require more salt and time to soften. A good rule of thumb is to use about 5-7% of the cabbage’s weight in salt. So, for 10 kg of cabbage, you’d use 500-700 grams of Cheonilyeom. Once salted, stack the cabbage halves in a large container, perhaps a clean tub or a large bowl, and place a heavy plate or lid on top to weigh them down. This pressure helps expel water.
Now, the waiting game begins! Let the cabbage sit at room temperature for at least 6-10 hours, or even overnight, depending on the cabbage’s size and thickness. Every 2-3 hours, check on it and turn the cabbage over, redistributing any accumulated brine. You’ll notice the cabbage softening, shrinking considerably, and releasing a significant amount of salty liquid. The leaves should become flexible and bend without breaking – like a well-exercised yoga instructor, not a stiff board! This flexibility is your indicator of readiness.
Rinse, Drain, and Prepare!
Once your cabbage is perfectly brined and flexible, it’s crucial to thoroughly rinse it. This step is vital to remove excess salt, which would otherwise make your kimchi unpalatably salty and inhibit proper fermentation. Rinse each cabbage half under cold running water, separating the leaves gently to ensure all salt is washed away. I usually rinse mine at least 3-4 times, sometimes more, until the water runs clear and the cabbage tastes only mildly salty. Then, squeeze out as much water as you can from each piece. This is important because any remaining excess water can dilute your paste and affect the kimchi’s texture and shelf life. Lay the rinsed cabbage halves in a colander and let them drain for at least 1-2 hours, or even longer, upside down. You can gently pat them dry with paper towels as well to ensure they’re ready for the glorious kimchi paste! This careful preparation is the secret to crunchy, flavorful kimchi that stays perfect for weeks.
Crafting the Legendary Kimchi Paste: The Flavor Maestro
Now that our beautiful Baechu is perfectly brined and waiting patiently, it’s time for the most exciting part: crafting the legendary kimchi paste! This is where all those incredible ingredients come together to create the distinctive, vibrant flavor and aroma that makes kimchi, well, kimchi! This paste isn’t just about heat; it’s a symphony of spicy, savory, sweet, and tangy notes, all designed to awaken your taste buds.
The Gochugaru Universe: Color, Heat, and Aroma
The superstar of our paste is, without a doubt, Gochugaru. As I mentioned before, it’s not just about heat. The unique profile of Korean chili flakes brings a nuanced smokiness, a subtle sweetness, and that unmistakable vibrant red hue. For a batch using 3-4 large cabbages, you’ll typically need 250-400 grams of coarse gochugaru. Sometimes, I like to mix a small amount (say, 50g) of fine gochugaru to enhance the color and ensure a smooth coating, while the coarse flakes provide texture. To fully bloom its flavor and color, I often rehydrate the gochugaru slightly by mixing it with a bit of the pul (rice porridge) or some water and letting it sit for 15-20 minutes before adding other ingredients. This simple trick, passed down by my grandma, deepens the red and softens the flakes perfectly!
Umami & Sweetness: Jeotgal, Pul, and Natural Sugars
Next, let’s talk about the umami bombs and sweeteners. The fermented seafood (Jeotgal) is absolutely vital here. If you’re using Myeolchiaekjeot (fermented anchovy sauce), you’ll typically add about 100-150 ml for our batch size. If Saeujeot (fermented shrimp) is your choice, mash about 50-100 grams of the shrimp thoroughly before adding it. This provides a deep, complex savory flavor that cannot be replicated. I usually add a bit of both for the ultimate depth, a little secret I picked up from a relative who runs a small Korean market in Vancouver!
The Pul (rice porridge) made from glutinous rice flour (about 50-80g flour cooked with 500ml water until thick) acts as a binding agent, helping the paste cling evenly to every cabbage leaf. More importantly, it provides a readily available source of carbohydrates for the lactic acid bacteria, giving them a fantastic head start and ensuring a robust fermentation. This is crucial for developing those complex, tangy flavors unique to well-fermented kimchi. For sweetness, a natural option like puréed Asian pear or apple (about 150-200g, or half a large fruit) works wonders, adding a delicate sweetness that balances the salt and spice without overpowering it. You can also add a few tablespoons of sugar if you prefer a sweeter profile. I’ve experimented with different fruits, and Asian pear really gives it that authentic, subtle sweetness!
Don’t forget the generous amounts of fresh garlic (250-400g minced), ginger (80-120g minced), and finely chopped scallions (200-300g). These aromatics are indispensable, providing the pungent, spicy, and fresh notes that are the hallmark of kimchi. For an extra layer of crunch and flavor, I often add matchstick-cut Korean radish (Mu, 700-1000g) directly into the paste mixture. Some people also like to add a handful of chives or julienned carrots for color and additional texture.
The Mixing Magic & The Crucial Taste Test
Now for the fun part: mixing! In a very large bowl, combine the rehydrated gochugaru, jeotgal, pul, puréed fruit/sugar, minced garlic, ginger, and any other fresh additions like radish, scallions, and chives. Mix everything thoroughly with your hands (wearing gloves is a must, unless you want stained, chili-burning hands for days!). Knead and massage the ingredients until you have a uniform, vibrant red paste.
This is the crucial taste test moment! Take a small spoonful of the paste and taste it. It should be intensely flavorful, a harmonious balance of spicy, savory, and slightly sweet. It might taste a little too salty at this stage, but remember it will balance out with the cabbage during fermentation. If it feels bland, add more jeotgal or salt. If it’s too spicy, a bit more puréed fruit or sugar can help. This is your chance to adjust it to your perfect preference! Every grandma has her own secret ratio, and this is where you start to find yours. Over the years, I’ve developed a sixth sense for it, but in the beginning, don’t be shy about tasting and adjusting!
The Final Touch: Stuffing, Storing, and the Waiting Game
Alright, my dear friend, we’re almost there! Your perfectly brined cabbage is patiently waiting, and your vibrant, aromatic kimchi paste is ready. Now comes the satisfying work of bringing it all together and setting the stage for that magical transformation: fermentation!
The Kimchi “Massage”
This is where your hands truly become an extension of Korean tradition. Take each brined cabbage half and begin to generously apply the kimchi paste between every single leaf. Don’t be shy! My grandma always said, “Give it a good massage!” You want to make sure every nook and cranny is coated with that glorious red mixture. Pay extra attention to the thicker white parts near the core, ensuring they are well-covered. This thorough coating is essential for even flavor distribution and consistent fermentation across the entire cabbage. As you go, gently fold the leaves towards the center of each cabbage half, forming a neat bundle. This helps keep the paste intact and also ensures the cabbage remains submerged in its own juices during storage. For a batch with 3-4 cabbages, this process can take a good 30-45 minutes, but it’s incredibly therapeutic and rewarding!
Optimal Storage for Fermentation
Once all your cabbage halves are beautifully stuffed, it’s time for storage. Traditionally, kimchi was stored in large earthenware pots called onggi (옹기) buried underground. While charming, that’s not exactly practical for most of us in modern homes! The best modern alternative is an airtight glass jar or, even better, a dedicated kimchi container. These specialized containers are designed to create an anaerobic environment, crucial for promoting the growth of beneficial lactic acid bacteria and preventing undesirable molds. Pack the stuffed kimchi tightly into your chosen container, pressing down firmly to remove any air pockets. Air is the enemy of good fermentation, encouraging spoilage. Ensure the kimchi and its juices fill the container, leaving about 2-3 cm (approximately 1 inch) of headspace from the rim to allow for expansion during fermentation. This is a critical detail that prevents overflows and maintains optimal conditions.
Understanding Fermentation: A Scientific Marvel!
Now comes the “waiting game,” which is actually the most dynamic and scientific part of kimchi making! Place your kimchi container at room temperature for 1-2 days. The ideal temperature range for initial fermentation is typically between 18-22°C (64-72°F). During this initial phase, the lactic acid bacteria naturally present on the cabbage and introduced through the jeotgal and other ingredients begin to actively convert the sugars in the vegetables into lactic acid. This process lowers the pH, creating that characteristic tangy flavor and preserving the kimchi. You might notice small bubbles forming as CO2 is produced, and a distinct, pleasant sour aroma will start to emerge.
After 1-2 days at room temperature, transfer your kimchi to the refrigerator (preferably below 4°C or 40°F). The colder temperature significantly slows down the fermentation process, allowing the flavors to deepen and mature gradually without becoming overly sour too quickly. Kimchi continues to ferment slowly in the fridge, developing more complex flavors over weeks and even months. Freshly made kimchi is delicious, but many prefer it after a week or two in the fridge when the flavors have had a chance to meld and deepen. This controlled fermentation is what makes kimchi not only incredibly tasty but also a powerhouse of probiotics! Recent studies, even as of 2025, continue to highlight kimchi’s significant health benefits, from gut health to immune support, confirming what Koreans have known for centuries. The global kimchi market is currently experiencing robust growth, projected to reach over USD 5 billion by 2027, demonstrating its widespread appeal and recognition as a superfood!
So, there you have it, my friend! From selecting the freshest ingredients to mastering the brining process, crafting that perfect paste, and finally, the patient art of fermentation, you’re now equipped with all the knowledge to make traditional kimchi just like a Korean grandma. This culinary journey is an experience, a commitment, and ultimately, a delicious triumph. Enjoy your homemade kimchi – you’ve earned every single bite! What a wonderful feeling, right?!
Frequently Asked Questions (FAQ)
Q: Can I make vegan kimchi without Jeotgal (fermented seafood)?
A: Absolutely! For vegan kimchi, simply omit the Jeotgal. To maintain a similar depth of umami flavor, you can use a combination of mushroom broth, dried shiitake mushrooms (rehydrated and minced), and perhaps a bit of miso paste or even vegan “fish sauce” alternatives made from seaweed and soy. The fermentation process will still occur beautifully!
Q: How do I know if my kimchi is fermenting properly?
A: You’ll notice several signs! After a day or two at room temperature, the kimchi should have a distinct, pleasantly sour aroma (not rotten!). You might see small bubbles forming within the container, indicating CO2 production from the active lactic acid bacteria. The cabbage should also become slightly softer and more translucent. If it smells off or shows signs of mold, it might have gone bad, which is rare if you followed the brining and hygiene steps carefully.
Q: My kimchi turned out too salty! What went wrong, and can I fix it?
A: This usually happens if the cabbage wasn’t rinsed thoroughly enough after brining. Unfortunately, it’s hard to “unsalt” kimchi once it’s made. However, you can try using it in cooked dishes like kimchi stew (kimchi jjigae) or fried rice (kimchi bokkeumbap), where the saltiness can be balanced by other ingredients. Next time, ensure you rinse the cabbage multiple times until it tastes only mildly salty.
Q: How long can homemade kimchi last in the refrigerator?
A: Properly made and stored kimchi can last for several months, even up to a year, in the refrigerator. The flavor will continue to deepen and become more sour over time. While it’s still safe to eat, very old, extremely sour kimchi is often preferred for cooking (like in stews) rather than eating raw as a side dish. Always use a clean utensil to serve to prevent contamination and extend shelf life.
Q: What if I don’t have Korean coarse sea salt (Cheonilyeom)? Can I use regular sea salt?
A: While Cheonilyeom is highly recommended for its mineral content and impact on fermentation, if it’s unavailable, a good quality coarse, unrefined sea salt will be your best substitute. Avoid fine table salt, especially iodized salt, as its rapid dissolution and anti-caking agents can negatively affect the cabbage texture and fermentation.
Q: Why do I need rice porridge (Pul) in my kimchi paste?
A: The Pul serves two main purposes. Firstly, its sticky consistency helps the gochugaru and other ingredients cling beautifully and evenly to the cabbage leaves, ensuring every bite is flavorful. Secondly, and perhaps more importantly, the cooked rice flour provides easily digestible carbohydrates for the lactic acid bacteria, giving them a quick energy source to kickstart and sustain a healthy fermentation process.
Q: Can I make kimchi with other vegetables besides Napa Cabbage?
A: Absolutely! While Napa cabbage kimchi (Baechu Kimchi) is the most iconic, there are hundreds of varieties of kimchi. Common alternatives include radish kimchi (Kkakdugi), cucumber kimchi (Oi Sobagi), green onion kimchi (Pagi Kimchi), and even various leafy greens. The basic principles of salting and paste-making remain similar, but the specific ingredients and cutting methods might vary.
Q: What are the health benefits of eating kimchi?
A: Kimchi is renowned for its impressive health benefits! As a fermented food, it’s packed with probiotics, beneficial bacteria that support gut health, improve digestion, and boost the immune system. It’s also rich in vitamins (A, B, C), minerals, and antioxidants from its fresh vegetable ingredients like cabbage, garlic, and ginger. Research in 2025 continues to explore its potential roles in everything from managing cholesterol to fighting inflammation, solidifying its status as a true superfood!