How to Make Kimbap Recipe
Hello, lovely people! It’s such a pleasure to have you here in my little corner of the internet. Today, we’re diving into one of my all-time favorite foods, something that tastes like childhood memories and happy picnics—Kimbap! 😋
Growing up, a family outing or school field trip in Korea was never complete without my mom waking up at the crack of dawn to roll dozens of these beautiful seaweed rice rolls. The whole house would fill with the nutty aroma of sesame oil. I’ve carried that tradition with me through my years in both Canada and the US, and let me tell you, sharing homemade kimbap with friends is one of my greatest joys. It’s the ultimate Korean comfort food, and by the end of this guide, you’ll be making it like a pro, I promise!
Now, many people see kimbap and think, “Oh, it’s Korean sushi!” While they look similar, they are quite different. Sushi rice is seasoned with vinegar, while kimbap rice is lovingly mixed with sesame oil and salt, giving it a savory, nutty flavor. Plus, kimbap is usually filled with cooked or preserved ingredients, making it a perfect, portable meal.
So, are you ready to roll? Let’s make some delicious kimbap together!
The Foundation: Getting the Rice and Seaweed Just Right
Before we even think about the colorful fillings, we have to master the basics. The rice and the seaweed are the heart and soul of kimbap, and giving them a little extra attention makes all the difference. This is the secret to kimbap that doesn’t fall apart and tastes amazing in every bite.
The Perfect Rice: It’s All About the Texture!
The rice is arguably the most crucial component. You need rice that is sticky enough to hold everything together but still has a pleasant, chewy texture where each grain is distinct.
- Choosing Your Rice: You absolutely want to use short-grain or medium-grain white rice. In North America, Calrose rice is a fantastic and widely available option. It has a higher concentration of amylopectin, the starch that makes rice sticky and glutinous, which is exactly what we need. Long-grain rice like Jasmine or Basmati is too dry and won’t hold the roll together, so save that for another dish!
- Cooking the Rice: A rice cooker is your best friend for this task. It delivers consistently perfect rice every time. A good ratio is 1 cup of rinsed rice to 1 cup of water. If cooking on the stovetop, bring the rinsed rice and water to a boil, then cover and simmer on low for about 15 minutes, and let it steam, covered, for another 10 minutes off the heat.
- Seasoning is Key: Once the rice is cooked, let it cool down just a bit so it’s not piping hot. Then, it’s time for the magic! For every 3 cups of cooked rice, I like to mix in about 1.5 tablespoons of good-quality toasted sesame oil and ½ teaspoon of fine sea salt. Use a rice paddle or a wooden spoon to gently “cut” and fold the seasonings into the rice. You want to mix without mashing the grains. The rice should be glistening and savory.
The Seaweed Wrapper (Gim – 김)
The seaweed, or gim in Korean, is what holds this beautiful package together. Not all seaweed sheets are created equal, you know!
- Find the Right Kind: Look for seaweed sheets specifically labeled for kimbap (kimbap-yong gim, 김밥용 김). These are slightly thicker and more durable than the kind used for Japanese sushi or for snacking, so they won’t tear as you roll. They are toasted but not seasoned with salt.
- Shiny Side, Rough Side: You’ll notice that one side of the seaweed sheet is shiny and smooth, while the other is dull and rough. Always, always place the gim shiny-side down on your rolling mat. The rough side grips the rice better, which helps create a tighter roll.
Your Kimbap Toolkit
You don’t need a lot of fancy equipment, but a few things make the process much smoother. A bamboo rolling mat (gimbal, 김발) is a lifesaver. It helps you get a perfectly round and tight roll. If you don’t have one, don’t worry! You can use a piece of parchment paper or aluminum foil layered with a flexible placemat. You will also need a very sharp knife—this is non-negotiable for getting those clean, beautiful slices.
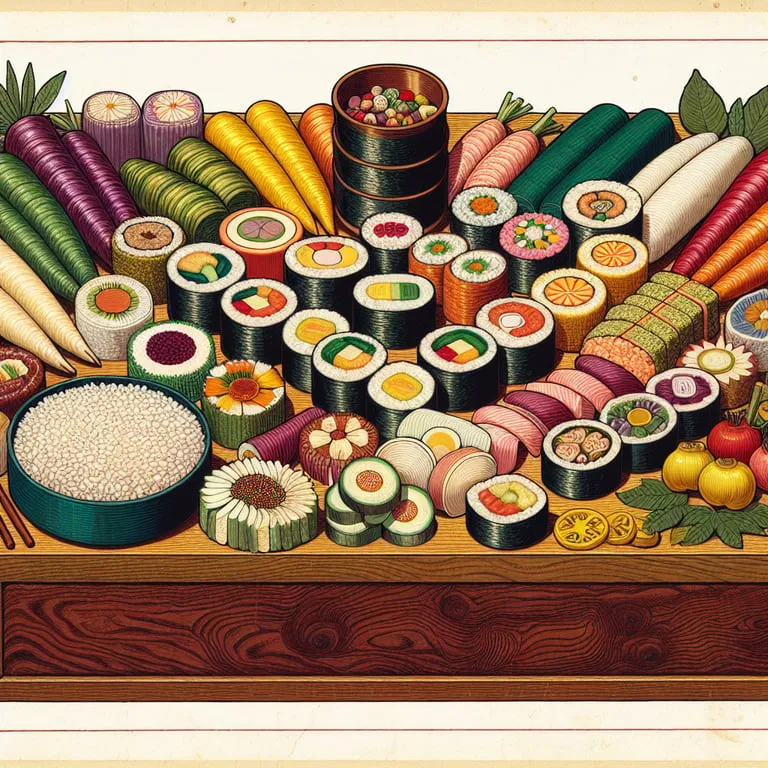
The Colorful World of Kimbap Fillings
This is where you can get really creative! The fillings are what make kimbap so vibrant and delicious. A great kimbap has a balance of colors, flavors (savory, sweet, tangy), and textures (crunchy, chewy, soft).
The Classic Combination You Have to Try
If you’re making kimbap for the first time, I highly recommend starting with the classic fillings. This combination is beloved for a reason—it’s just perfect!
- Yellow Pickled Radish (Danmuji – 단무지): This bright yellow, crunchy ingredient is essential! It adds a fantastic sweet and tangy crunch that cuts through the richness of the other ingredients. You can buy it pre-sliced into long strips at any Korean grocery store.
- Seasoned Spinach (Sigeumchi Namul – 시금치나물): To prepare it, you just need to blanch a bunch of spinach in boiling water for about 30-45 seconds, then immediately plunge it into an ice bath to stop the cooking and keep its vibrant green color. Squeeze out all the excess water, then season with a little sesame oil, salt, and minced garlic.
- Stir-fried Carrots: Julienne one or two carrots into thin matchsticks. Stir-fry them in a lightly oiled pan with a pinch of salt for 2-3 minutes until they are slightly softened but still have a bit of a bite. This brings out their natural sweetness.
- Egg Strips (Gyeran Jidan – 계란지단): Beat 2-3 eggs with a pinch of salt. Pour a thin layer into a lightly oiled non-stick pan over low heat to make a thin omelet or crepe. Cook on both sides, then let it cool. Slice it into long, thin strips.
- Optional Savory Add-ins: Many classic recipes also include seasoned burdock root (ueong jorim, 우엉조림) for a sweet and savory chewiness, or stir-fried fish cake (eomuk, 어묵), which adds a wonderful umami flavor.
Modern Twists and Fun Variations for 2025!
One of the best things about kimbap is how adaptable it is. Here in North America, I love mixing traditional fillings with ingredients my friends are familiar with. It’s so much fun!
- Spicy Tuna Kimbap: This is a huge crowd-pleaser! Just mix a can of drained tuna with mayonnaise and a little bit of sriracha or gochujang for a kick.
- Bulgogi Kimbap: If you have leftover bulgogi (Korean marinated beef), you’ve got the makings of an incredible kimbap. The savory, sweet meat is an amazing filling.
- Vegetarian & Vegan Kimbap: Kimbap is so easy to make vegan. Use seasoned pan-fried tofu strips, creamy avocado slices, shiitake mushrooms sautéed in soy sauce, and crunchy bell pepper strips. The possibilities are endless!
- Cheese Kimbap: My Canadian friends got a real kick out of this one! Just add a strip of American cheese or mozzarella. When the kimbap is freshly made and the rice is still warm, the cheese gets slightly melty. It’s a favorite with kids (and kids at heart!).
The Art of the Roll: Putting It All Together
Okay, deep breath! This is the part that might seem intimidating, but I promise, after one or two tries, you’ll get the hang of it. Let’s roll!
Step-by-Step Rolling Guide
- Prep Your Station: Have your bamboo mat ready, the gim sheets, the bowl of seasoned rice, and all your beautiful fillings arranged and ready to go. Also, prepare a small bowl of water.
- Place the Seaweed: Lay one sheet of gim on the bamboo mat, shiny-side down.
- Spread the Rice: Dip your fingers in the water to prevent sticking, and grab a handful of rice (about ¾ to 1 cup). Spread it evenly over the bottom two-thirds of the seaweed sheet. Don’t press down too hard, and don’t make the layer too thick, or your roll will be hard to close! Leave the top 2 inches (about 5 cm) of the seaweed bare.
- Arrange the Fillings: Lay your fillings in neat horizontal lines across the center of the rice. Try to build them up a little bit. This is what will create that beautiful mosaic in the center of each slice.
- The First Tuck and Roll: Here we go! Lift the bottom edge of the bamboo mat (the edge closest to you) with your thumbs. Use your other fingers to hold the fillings in place. Roll it up and over the fillings, tucking that edge under the fillings to start a tight cylinder.
- Keep Rolling: Once you have that initial tuck, continue to roll the mat forward, applying gentle, even pressure with your hands to shape the roll. This ensures there are no gaps inside.
- Seal It: When you reach the end, dab a little water or use a few grains of mashed rice on the bare edge of the seaweed to act as glue. Finish the roll, and give it one last gentle squeeze with the mat to seal it completely.
Slicing and Serving
You’ve made a beautiful kimbap roll! Now, let’s slice it up.
- The Secret to Clean Cuts: The trick is a very sharp knife and a little bit of sesame oil. Before slicing, brush a thin layer of sesame oil over the finished roll—this adds flavor and a lovely sheen. Then, wipe your sharp knife with a bit of sesame oil or a damp paper towel before each cut. This prevents the rice from sticking and gives you perfectly clean slices.
- Slice and Arrange: Cut the roll into bite-sized pieces, about ¾-inch (1.5-2 cm) thick. I like to trim off the very ends (the cook’s snack!) and then arrange the beautiful slices on a platter.
- Enjoy Immediately!: Kimbap is truly at its best when enjoyed fresh, at room temperature. Pack it for a picnic, a work lunch, or just enjoy it right away for a delicious meal. If you have leftovers, the best way to revive them is to dip each slice in a beaten egg and pan-fry it until golden. It’s absolutely divine!
Making kimbap is more than just following a recipe; it’s an act of love. It’s about creating something beautiful and delicious to share. I hope you have so much fun making it and creating your own wonderful memories.
❓ Frequently Asked Questions (FAQ)
Is kimbap similar to sushi?
A: While they look alike since both are rolled in seaweed, they are quite different! Kimbap is a Korean dish that uses sesame oil-seasoned rice and typically features cooked or pickled fillings. Japanese sushi, on the other hand, uses vinegar-seasoned rice and often highlights raw fish.
Can I use brown rice instead of white rice?
A: You can, but it can be a bit tricky! Brown rice is less sticky than white rice. If you use it, I recommend choosing a short-grain brown rice and maybe even mixing in a little sweet brown rice to help it bind together better.
Why is my kimbap falling apart?
A: There are a few common reasons for this! You might be overstuffing it with fillings, not rolling it tightly enough, or the rice layer might be too thick. Make sure to apply firm, even pressure as you roll with the bamboo mat and leave a bit of space at the top of the seaweed sheet to seal it securely.
What’s the best way to store leftover kimbap?
A: Kimbap is best eaten the same day. The rice tends to harden in the refrigerator. If you must store it, wrap the uncut roll tightly in plastic wrap and refrigerate. To enjoy leftovers, I highly recommend dipping the slices in beaten egg and pan-frying them until golden and heated through. It’s a delicious transformation!
Is kimbap healthy?
A: Absolutely! Kimbap can be a very well-balanced meal. It contains carbohydrates from the rice, protein from fillings like egg, tofu, or meat, and plenty of vitamins and minerals from all the vegetables. The seaweed itself is a great source of iodine and other nutrients.
Can I make kimbap gluten-free?
A: Yes, it’s very easy to make gluten-free kimbap. Most of the basic ingredients are naturally gluten-free. Just be careful with processed fillings like fish cakes or imitation crab, and if you’re using a marinade for something like bulgogi, be sure to use a gluten-free soy sauce or tamari.
Do I absolutely need a bamboo rolling mat?
A: While a bamboo mat (gimbal) helps a lot in getting a tight, uniform roll, you can definitely make kimbap without one! A piece of parchment paper or aluminum foil can work in a pinch. Just be a bit more careful to apply even pressure with your hands as you roll.
My seaweed gets soggy sometimes. How can I prevent that?
A: This usually happens if your rice is too wet or if you let the prepared kimbap sit for too long. Make sure your rice has cooled to a warm room temperature before spreading it, and ensure that your fillings, especially the spinach, have been squeezed very well to remove excess moisture.